In this article, we will install and carry out the basic settings of the IIS web server on a server running the Windows Server 2012-2019 operating system.
1. Install the IIS web server role.
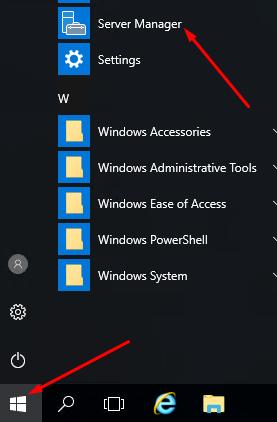
Start - Server Manager
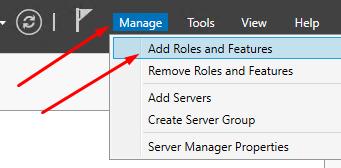
Next Management (Manage) - Add Roles and Features (Add Roles and Features)
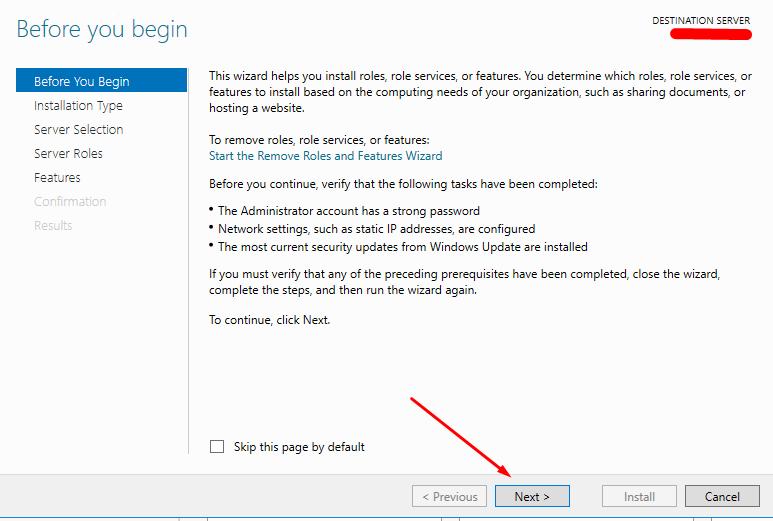
Click Next
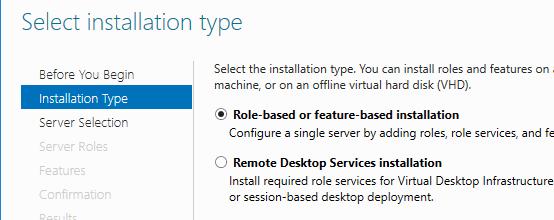
Leave the selected option Installing roles or features (Role-based or feature-based installation) and Next
Select the local server, click Next (Next)
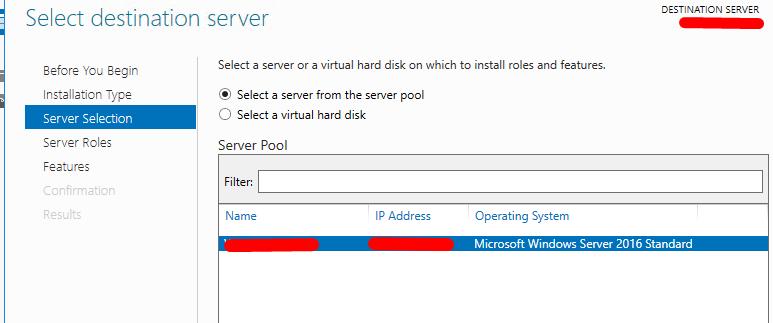
Select Web Server Web Server (IIS), click Add Features and Next
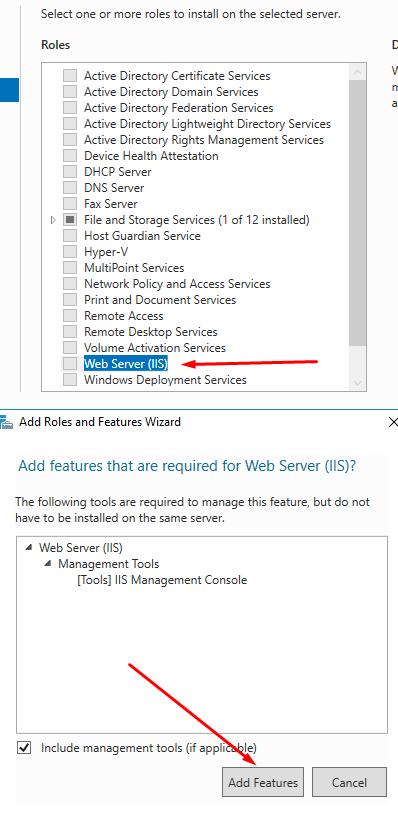
In the next window Next
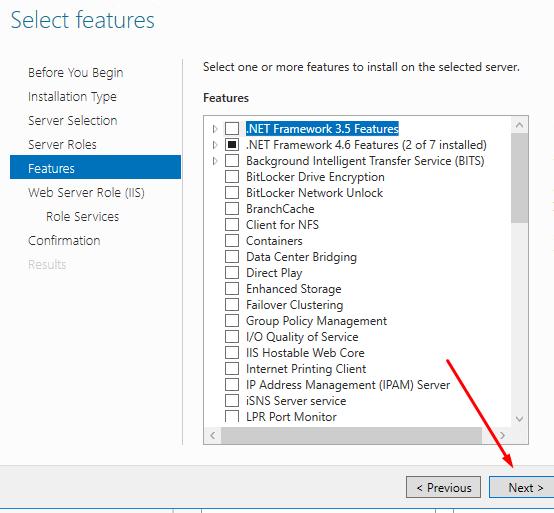
Next
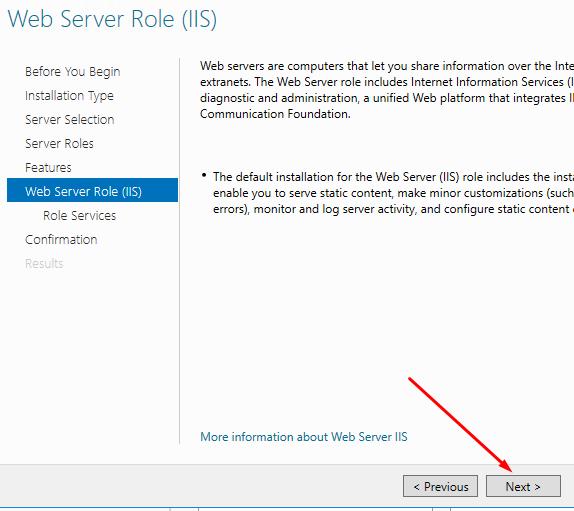
Choose to install CGI (in the Application Development section). I also recommend installing an additional FTP server, which will allow you to upload files to the server using an FTP client (for example, FileZilla)
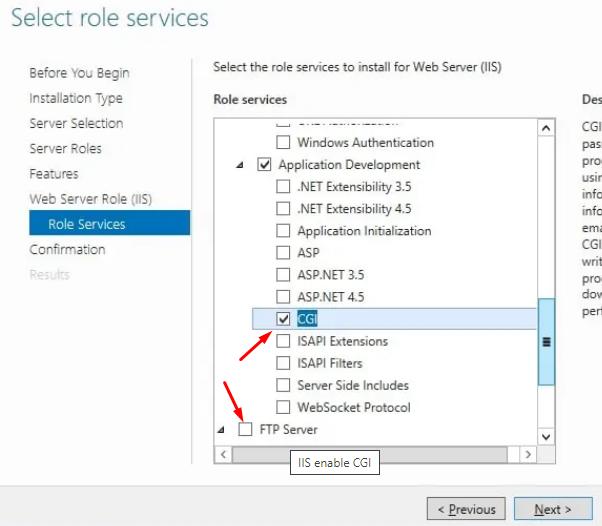
Next (Next), check the box to automatically restart the server after installing the role and the Install button
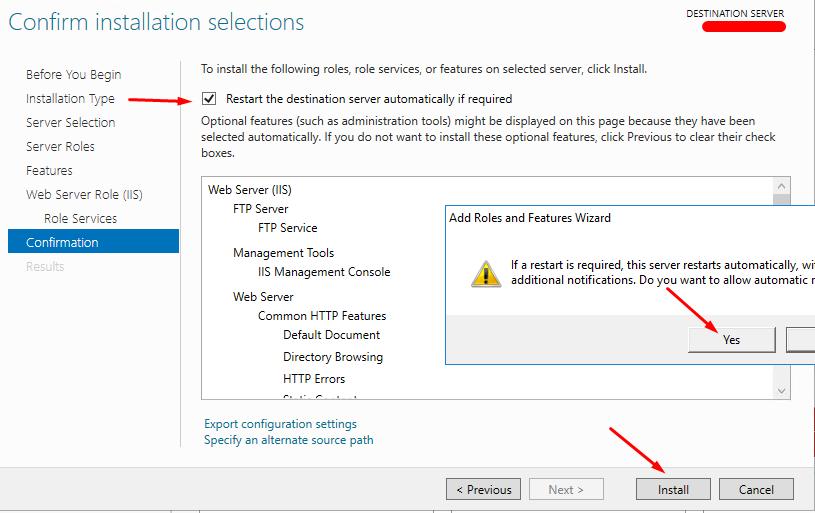
After restarting the server, IIS will start automatically. But if you need to restart, just run the command (Start - Run)
iisreset
or run
iisreset /start
To test the operation of the web server, open the page in the browser http://localhost/
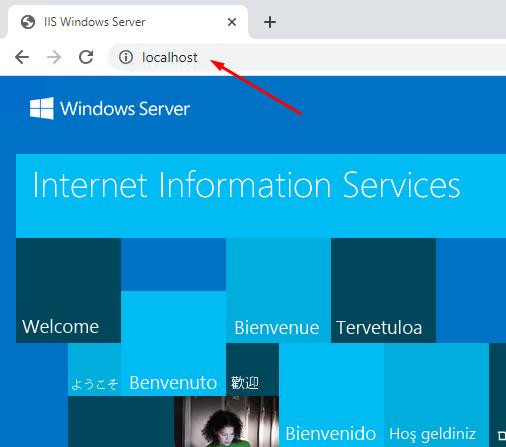
The default site root folder is located at the path
C:\inetpub\wwwroot
But it often happens that you need to host several sites on a server. For this reason, let's create a test site with its own root folder.
2. Create a site in IIS
First, let's create the site's root folder on the server's disk. For example, we will use the site name domain.name
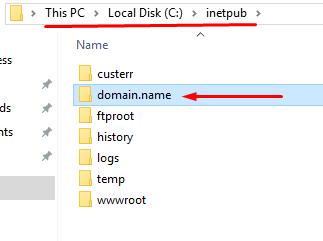
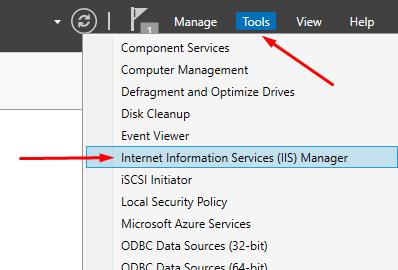
Next, in the Server Manager - in the Tools menu - open the IIS Manager (Inet Information Services (IIS) Manager)
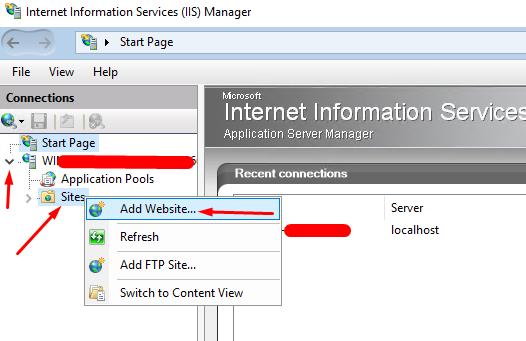
In the IIS Manager window, you need to open the server menu - Sites - right-click - Add website ... (Add Website ...)
Fill in the required fields indicated in the screenshot
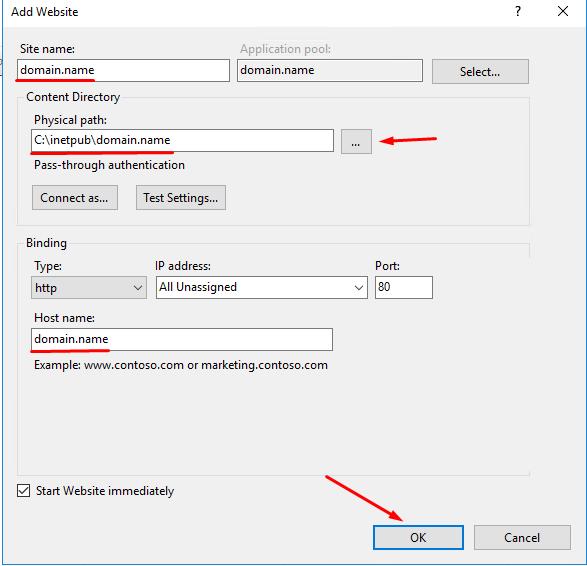
Site name - an arbitrary name of the site.
Physical path - the path to the root folder of the site.
Type (Type) - protocol type (http or https). For the initial setup of the site, the http protocol will suffice.
Host name - domain name of the site.
We press the OK button and we see that in the list of sites, in addition to the default site, our newly created site has been added.

To test the site, let's create a file in its root directory called index.html and copy the following content into this file
<html>
<body>
Zomro: Test HTML page
</body>
</html>
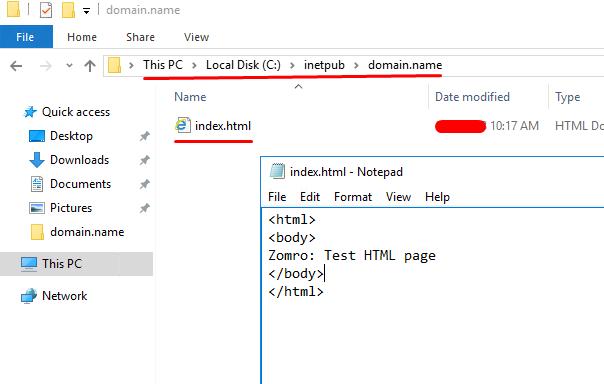
Note: The index.html file can be opened with Notepad or another text editor.
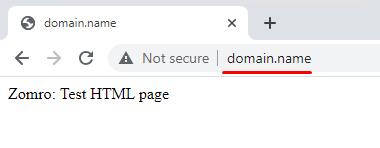
Open the page of your site in the browser (in our example it is domain.name) and you will see such a page.
3. IIS and PHP integration
Before completing this step, PHP must be installed on the server. To do this, use the article: How to install and configure PHP on Windows Server
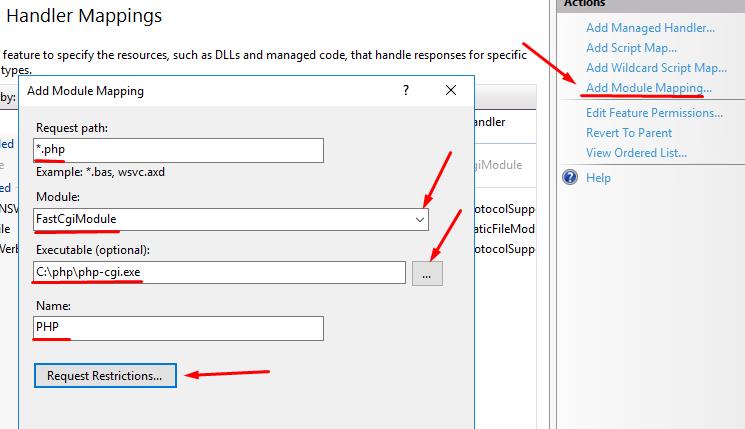
In order for the web server to successfully process php requests, it is necessary to integrate IIS and PHP. To do this, in the IIS Module, go to the menu of our site and open the Handler Mappings

in the list of Actions (Action) of which there is a menu item "Add module handler" (Add Module Mapping). Fill out the form as in the screenshot and click the "Request Restrictions..." button
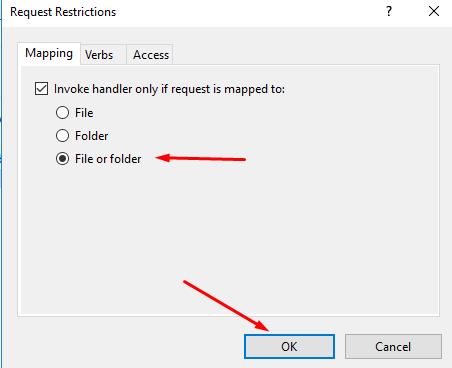
Select the option "File or folder" (File or folder)
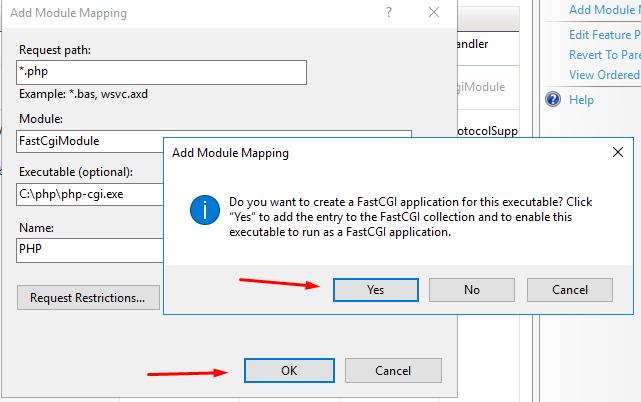
Click OK, then OK again on the module handler form and confirm the creation of the action
In the list of handlers, the newly created one should appear:

Now let's add a setting at the web server level so that the index.php file opens as the default page.
To do this, in the menu of the server (and not the site), open the "Default document" (Default document),
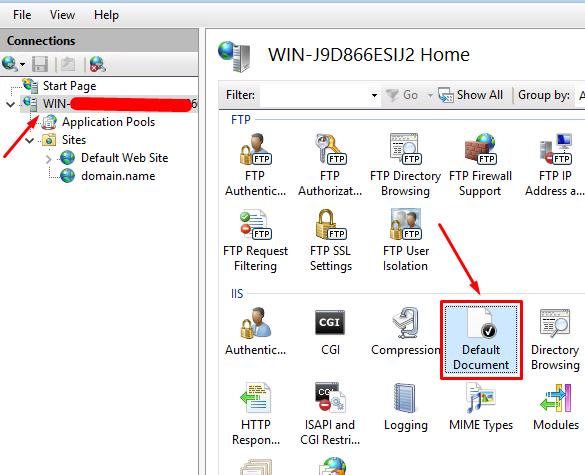
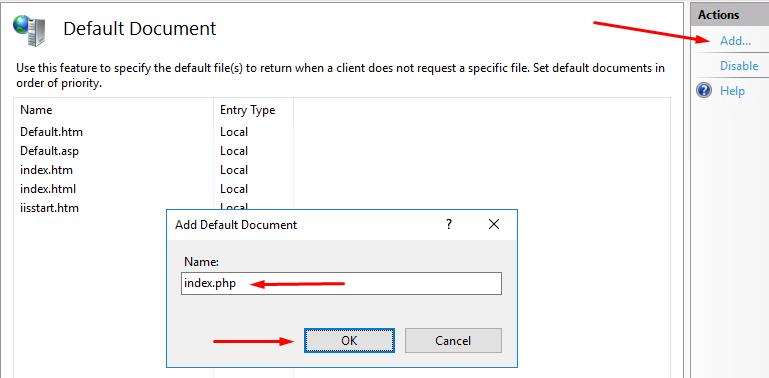
select "Add" (Add) in the list of actions, fill in the Name field with the index.php value and click OK
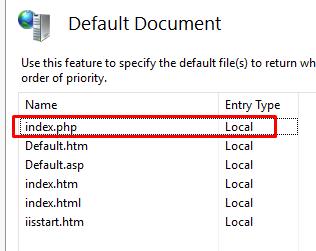
Result
You must restart the web server to apply all settings. To do this, stop it
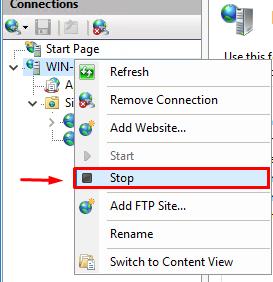
and run
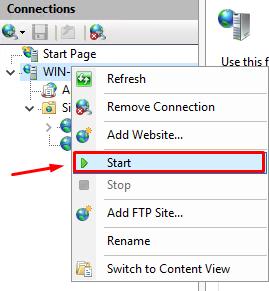
Web server integration with PHP is set up.
Let's test the PHP script. To do this, in the root folder of the site, create a file called index.php, open it in notepad and add the following content
<?php
phpinfo();
?>
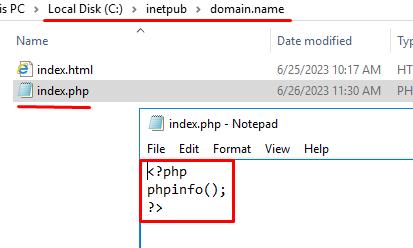
Save the file and refresh the site in the browser http://domain.name/
A page like this should appear
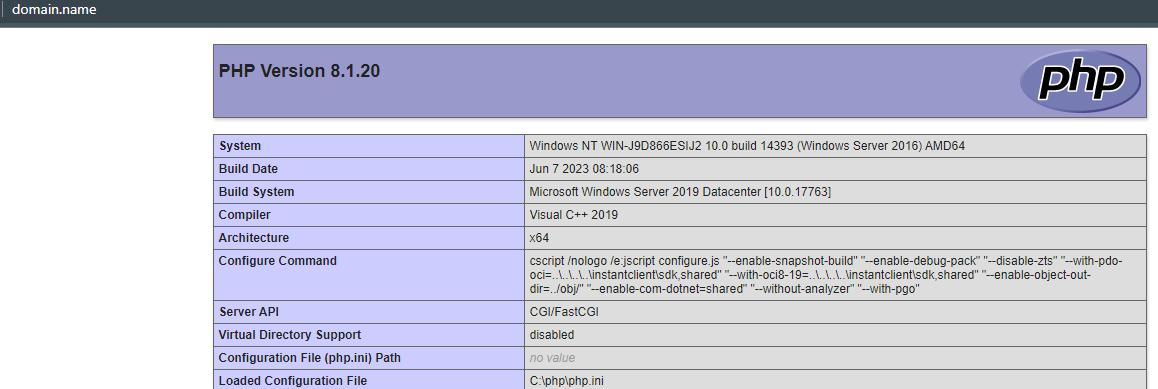
This means that PHP scripts are successfully processed by the web server.
In this article, we learned how to install an IIS web server on Windows Server 2012-2019, perform initial settings, integrate with previously installed PHP, and create a separate site in IIS Manager.

