
But sometimes, VPN requires you to install special client software on your personal computer or smartphone, which you may not have sufficient rights to do. In this case, you can use the free alternative to the SOCKS 5 proxy tunnel.
In this article, we will look at how to install it in a Docker container using docker-compose as well.
Let's install Docker.
But first, you need to update the OS packages.
apt update
Install the necessary packages and add a new repository:
apt install apt-transport-https ca-certificates curl gnupg-agent software-properties-common

curl -fsSL https://download.docker.com/linux/ubuntu/gpg | sudo apt key add -

add-apt-repository "deb [arch=amd64] https://download.docker.com/linux/ubuntu $(lsb_release -cs) stable"
Update the packages with the new repository:
apt update
Now let's install Docker itself.
apt-get install docker-ce docker-ce-cli containerd.io
Let's check the version:
docker --version

Let's check the status:
systemctl status docker
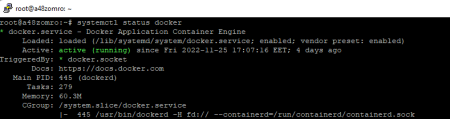
If it does not start, then run:
systemctl start docker
And add to autorun.
systemctl enable docker

Install Docker Compose
For this project, version 1.25 will be enough for us.
curl -L "https://github.com/docker/compose/releases/download/1.25.5/docker-compose-$(uname -s)-$(uname -m)" -o /usr/local/bin /docker-compose
Set permissions to launch.
chmod +x /usr/local/bin/docker-compose
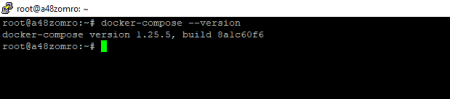
Check how Docker-Compose was installed:
docker-compose --version
Add a Linux user to the docker group:
usermod -aG docker $USER
Let's create a *.yaml file for Docker-Compose.
To navigate in the future in what we have installed, let's create a separate folder for this project in the /home directory and go to it.
mkdir /home/socks5 && cd /home/socks5
You can also use a different directory to host this and other projects.
Let's use the repository to create the docker-compose.yaml file at https://hub.docker.com/r/xkuma/socks5
Create a docker-compose.yaml or docker-compose.yml file,
vim docker-compose.yaml
version: "2.1"
services:
  socks5:
    image: olebedev/socks5
    container_name: socks5_test
    environment:
      - PROXY_USER=your_user
      - PROXY_PASSWORD=your_pass
    ports:
      - 1080:1080/tcp
    restart: always
Where:
container_name: name of your container;
PROXY_USER: user;
PROXY_PASSWORD: user password
1080:1080/tcp: port on which SOCKS will work.
Run the script (to do this, you need to be in the directory where our file was created. In this case, it is /home/socks5/):
docker-compose up -d
We are waiting for the download of images, and deployment.
We check:
docker-compose ps
or
docker ps

It can also be done with one command without using docker compose.
docker run -d -p 1080:1080 -e PROXY_USER=your_user -e PROXY_PASSWORD=your_pass -e PROXY_SERVER=0.0.0.0:1080 xkuma/socks5
Now you can use your login and password with the port and IP of your server to connect.
To check and make sure everything is configured correctly, we can use the following command on another server:
curl --socks5 your_user:your_pass@192.168.0.100:1080 https://ifconfig.io
If everything is configured correctly, then in response, we will receive the IP of the server hosting our SOCKS5.
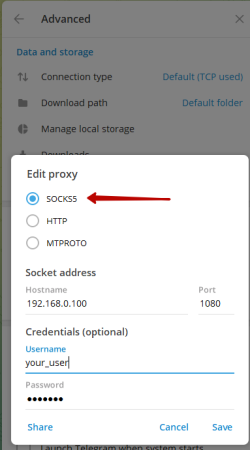
For example, to connect SOCKS5 to Telegram, enter:
Server/Host: IP:1080
User: your_user
Password: your_pass
In browsers, Google Chrome or Firefox, you can use additional plugins to connect this SOCKS5.
Safe surfing for you.