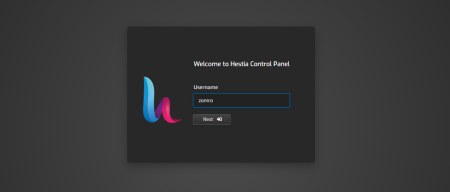
1. Enter the Hestia panel the link below, in which you need to replace the word "IPaddress" with the IP address of your server:
https://IPaddress:8083
Next, you need to enter a user and password.
Please note, by default, there is no possibility to create databases under the "admin" user, you need to either change the package of permissions for "admin" in user settings, or create a new user. I recommend creating a new user, under which you will perform all actions with your websites and databases.
Enter the user and password under which your websites work, in my case it is the user "zomro", you will have to use any other user that you created before.

2. In the panel, go to the DB tab and click the Add Database button


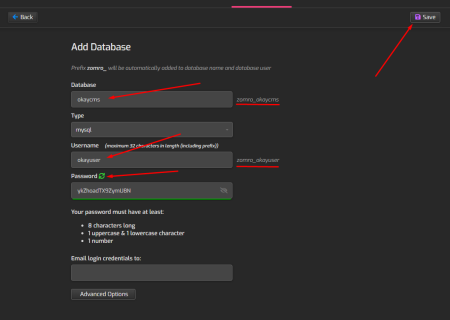
3. Enter the name of the database, the username and the password (in order to generate a password automatically, you can click the green icon, as in the screenshot below).
You will use this data to connect to your database, so write it down somewhere.
Note: a prefix will be added to the name of the database and the user, in my case it is "zomro_", since I work under the user zomro. The name of the database "okaycms" in the end will look like "zomro_okaycms", the same applies to the username - "zomro_okayuser"
After all the data has been entered, click the Save button.

4. You will see a message that the database has been created successfully.
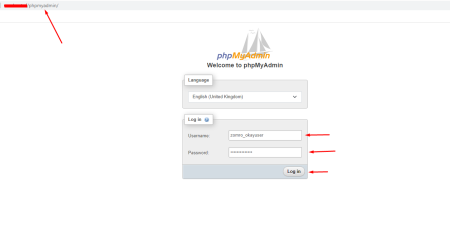
To check database access, we can go to phpmyadmin using the data entered earlier.

If the link http://IPaddress/phpmyadmin is not available, then you can go to the phpmyadmin panel using the domain of any of your websites, for example http://yourdomain/phpmyadmin
By default in Hestia panel, the link to the address is disabled for security reasons, since the links http://IPaddress/phpmyadmin are often become a target for intruders.


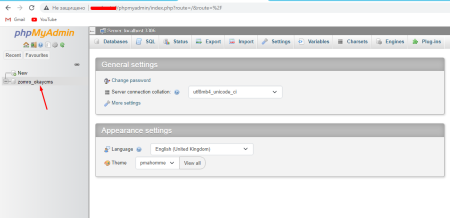
We were able to successfully log in to phpmyadmin using the database's credentials, which means you can now connect the database to your website.
I hope this article was useful, thank you for your time.

