So let's install Docker.
As usual, we update the OS packages.
apt update
Install the necessary packages and add a new repository:
apt install apt-transport-https ca-certificates curl gnupg-agent software-properties-common

curl -fsSL https://download.docker.com/linux/ubuntu/gpg | sudo apt key add -

add-apt-repository "deb [arch=amd64] https://download.docker.com/linux/ubuntu $(lsb_release -cs) stable"
Update packages with the new repository:
apt update
Install Docker.
apt-get install docker-ce docker-ce-cli containerd.io
Checking Docker version:
docker --version
 Let's see the status:
systemctl status docker
 If it doesn't start, run:
systemctl start docker
And add to autorun.
systemctl enable docker

Install Docker Compose
curl -L "https://github.com/docker/compose/releases/download/1.25.5/docker-compose-$(uname -s)-$(uname -m)" -o /usr/local/bin /docker-compose
Set run permissions for docker-compose.
chmod +x /usr/local/bin/docker-compose
Check if Docker-Compose is installed:
docker-compose --version

As you can see, everything is in order. Let's move on to creating a file for Docker-Compose.
To navigate in the future where and what we have installed, let's create a separate folder for this project in the /home directory and go to it.
mkdir /home/mysql && cd /home/mysql
In this guide, we will be installing a specific version of MySQL 8. To do this, we will use the repository from hub.docker.com
To create the docker-compose.yaml file, we will use the repository at the link https://hub.docker.com/_/mysql
Create a docker-compose.yaml or docker-compose.yml file:
vim docker-compose.yaml
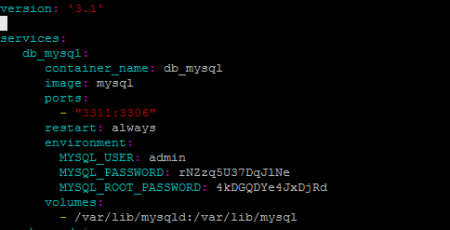
And add the following code to it:
version: '3.1'

services:
   db_mysql:
      container_name: db_mysql
      image: mysql
      ports:
        - "3311:3306"
      restart: always
      environment:
        MYSQL_USER: admin
        MYSQL_PASSWORD: rNZzq5U37DqJlNe
        MYSQL_ROOT_PASSWORD: 4kDGQDYe4JxDjRd
      volumes:
        - /var/lib/mysqld:/var/lib/mysql
Where:
db_mysql: name of your container;
image: mysql: the image from which mysql 8 will be deployed;
ports: 3311:3306 - port 3311 which we will use to connect to mysql;
restart:always - indicates that the container will be restarted when the server crashes or restarts;
mysql_USER: creating a new user in this case is admin;
mysql_PASSWORD: password for the admin user;
mysql_ROOT_PASSWORD: this password will be set for the mysql superuser root account;
In volumes, we prescribe a shared directory so that when the container is restarted, the database data is saved.
We run our script (for this you need to be in the directory where our file was created. In this case, it is /home/mysql):
docker-compose up -d
We are waiting for the download of images, and deployment.
We check:
docker-compose ps
or
docker ps

To view the logs, use the command
docker logs -f db_mysql
Also, this version of the mysql 8 database can be installed along with phpMyAdmin and linked to it. Let's see how to do it.
Let's edit the created docker-compose.yaml file
vim docker-compose.yaml
Let's add the following structure below:
version: '3.1'

services:
   db_mysql:
      container_name: db_mysql
      image: mysql
      ports:
        - "3311:3306"
      restart: always
      environment:
        MYSQL_USER: admin
        MYSQL_PASSWORD: rNZzq5U37DqJlNe
        MYSQL_ROOT_PASSWORD: 4kDGQDYe4JxDjRd
      volumes:
        - /var/lib/mysqld:/var/lib/mysql
   phpmyadmin:
      container_name: phpmyadmin
      image: phpmyadmin
      restart: always
      ports:
        - "8091:80"
      environment:
        - PMA_HOST=db_mysql
      depends_on:
        - db_mysql
In the phpmyadmin sector, we added the phpmyadmin image, specified port 8091 to it, but now it will be bound to a specific database server, namely the one that we installed/deployed mysql 8
This parameter is written in the enviroment block where:
PMA_HOST=db_mysql - points to the mysql container/block which is described above in this file.
Also, the depends_on: directive indicates the start/start dependency on the db_mysql container. This means that until the container with mysql is started, the container with phpmyadmin will not be started.
We can start phpmyadmin and mysql with one command.
docker-compose up -d
We check:
docker-compose ps
As you can see, the containers are missing.
 In this way, you can install the version of the MariaDB database that you need. How to do this, you can find in this article.
