Since the ping command tells/shows that the remote computer is connected to the network, it is a useful command for system administrators.
If for some of your purposes or for monitoring you need to enable ICMP packets, or ping, then you can use the instructions below.
It can be enabled manually without using group policies.
If ICMP packets are not enabled on your computer, you will receive a timeout message.
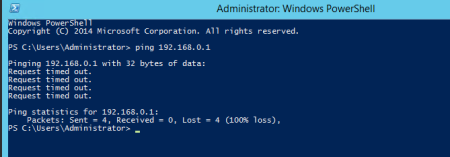
How to enable Ping in Windows Firewall
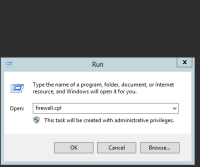
To enable firewall ping, follow these steps:Open the firewall by pressing Win + R and write the command firewall.cpl.
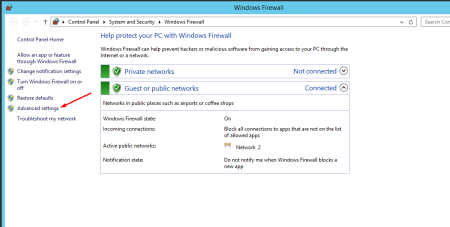
In the window that opens, click Advanced Settings on the right panel. Select Inbound Rules in the left pane and New Rule in the right pane.
Select File and Printer Sharing under Predefined Rules. And click Next.
Choose the following two rules:
File and Printer Sharing (Echo Request - ICMPv6-In)
File and Printer Sharing (Echo Request - ICMPv4-In)
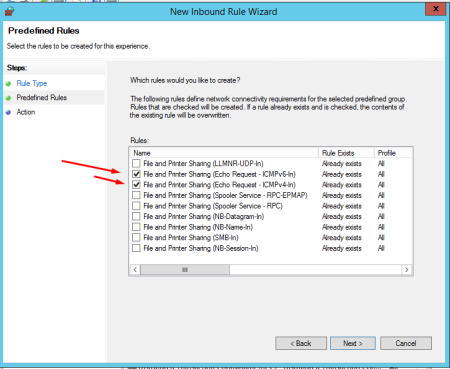
And click Next.
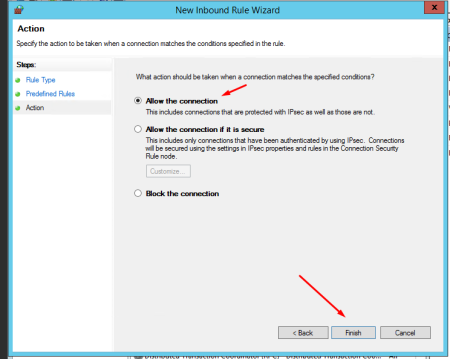
Select Allow the connection. Click Finish.
How to enable ICMP (Ping) from command line or PowerShell
To do this, open a command prompt by pressing Win+R and type cmd.
Allow IPv4 ping from command line:
netsh advfirewall firewall add rule name="ICMP Allow Ping V4" protocol="icmpv4:8,any" dir=in action=allow
Allow ping IPv4 with PowerShell:
New-NetFirewallRule -DisplayName "ICMP Allow Ping V4" -Direction Inbound -Protocol ICMPv4 -IcmpType 8 -RemoteAddress <localsubnet> -Action Allow
If after testing and settings, it is necessary to disable ICMP packets, then we can also use the command line for this.
Block ping IPv4 from command line:
netsh advfirewall firewall add rule name="ICMP Allow Ping V4" protocol="icmpv4:8,any" dir=in action=block
Block ping IPv4 with PowerShell:
New-NetFirewallRule -DisplayName "ICMP Allow Ping V4" -Direction Inbound -Protocol ICMPv4 -IcmpType 8 -RemoteAddress <localsubnet> -Action Block
