
RAID is a storage technology that combines multiple disks, two or more, into one logical unit.
For example, RAID 1 due to mirroring, i.e., data is written equally to two disks, ensuring data safety in case one of the disks fails. But RAID 0, instead of mirroring, uses striping, i.e. data is distributed across all disks. This means that RAID 0 does not provide fault tolerance, and if any of the drives fail, the data on the drives will be lost.
Since everyone can choose which RAID to configure on their server, we will consider both options.
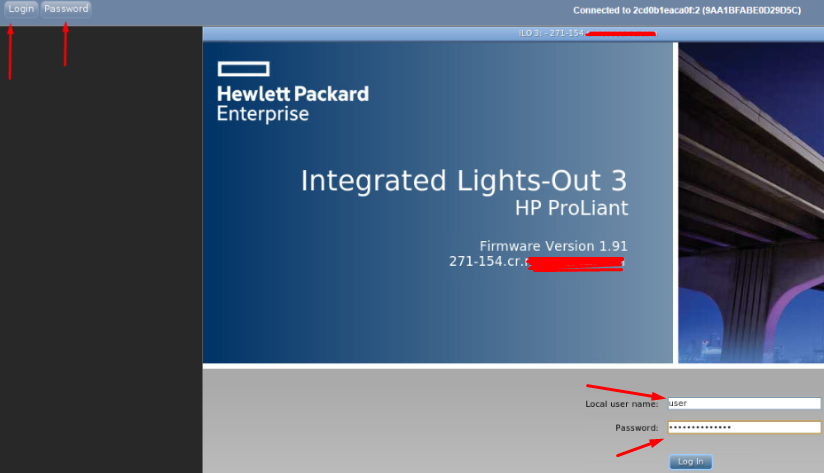
To connect to your server in DCI Manager, use the login information that was sent to your email, or click Go, after selecting the dedicated server service in your personal account.
Next, select the required server in the DCI panel, if you have more than one, and click Go.
To connect via IPMI, use the data that you have entered. To do this, place the cursor in the Local User Name field and click the Login button. After, place the cursor in the Password field and click Password. After filling in the fields, click Log in.
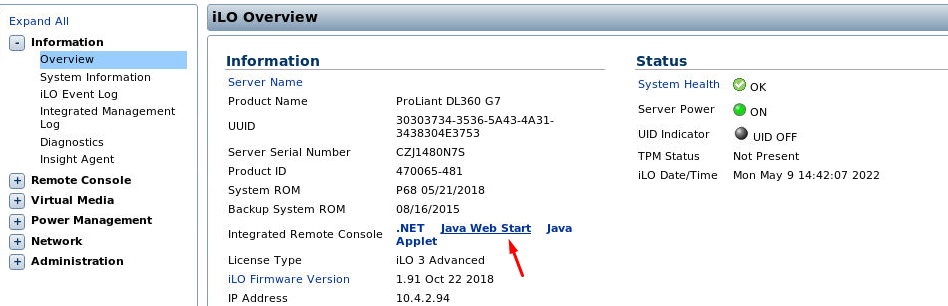
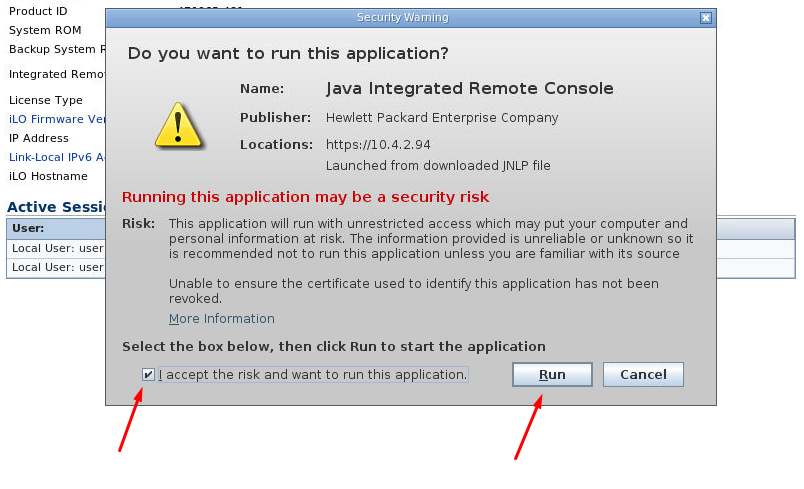
Now you need to use Java Web Start to connect directly to the server.
 We save
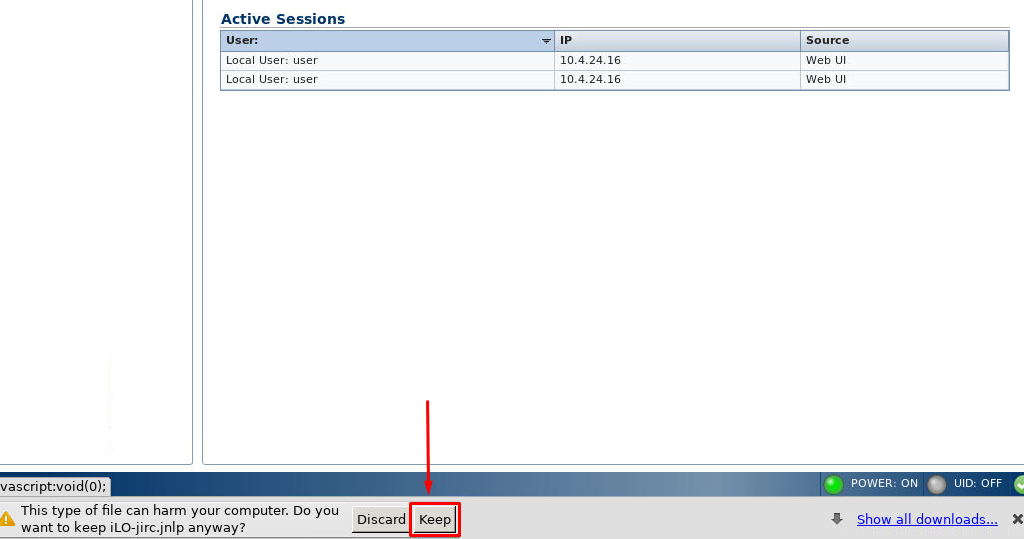 We open
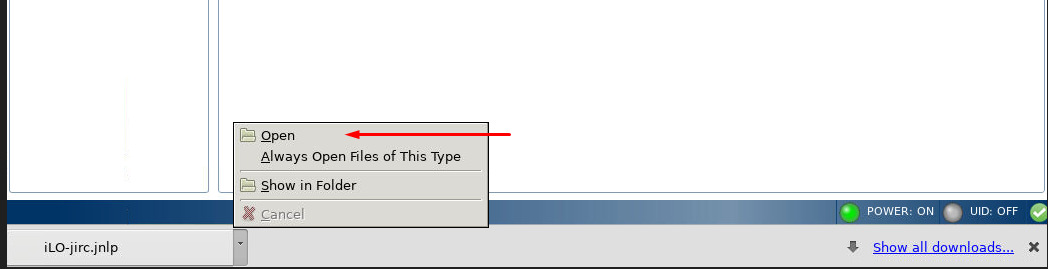
 If your server is on, then restart it.
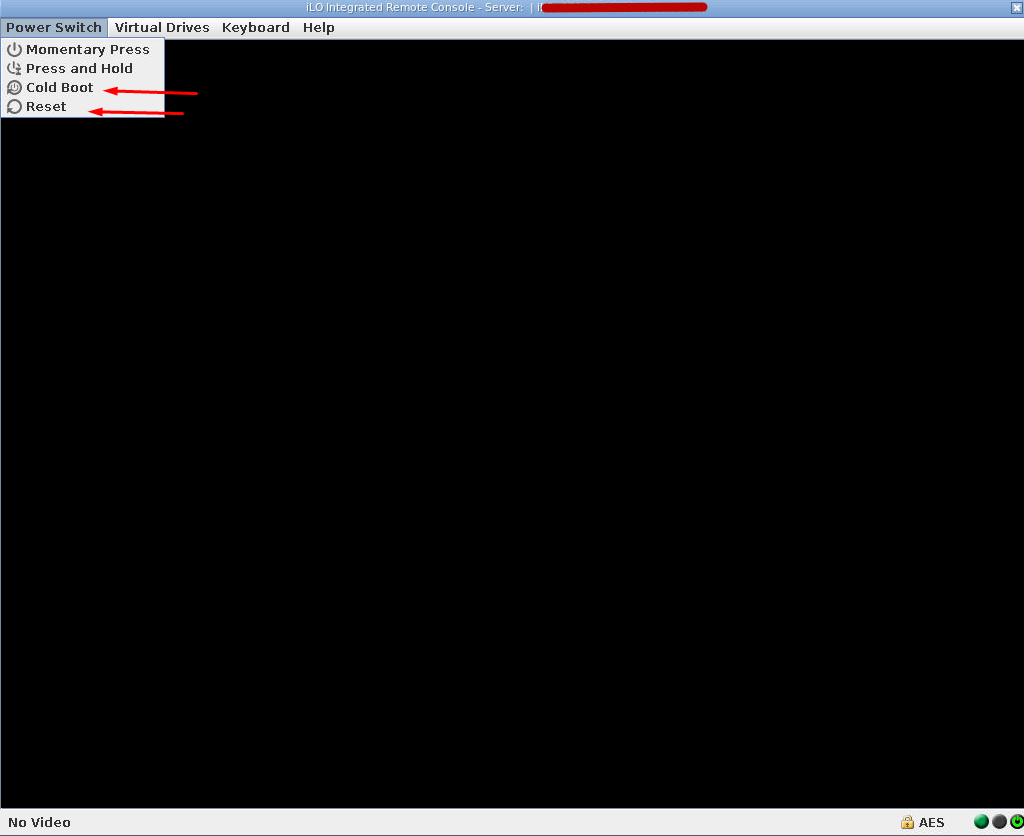
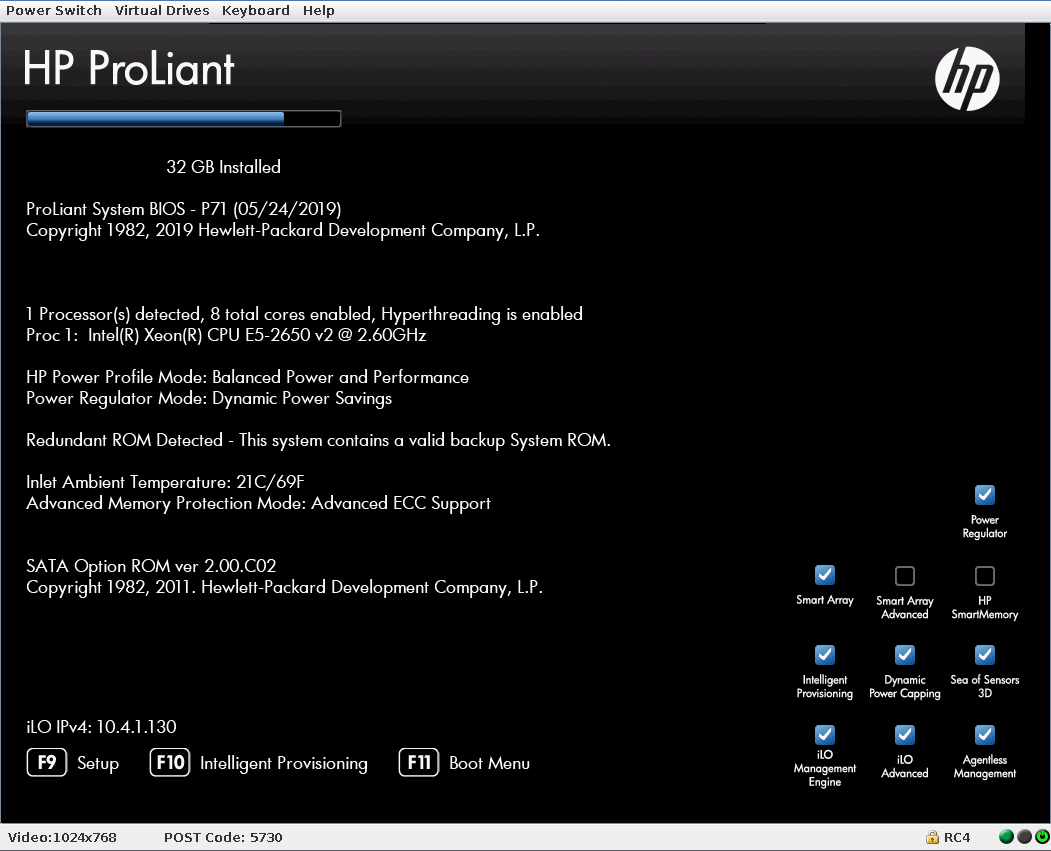
We are waiting for a complete restart, and as soon as the menu items appear (F9 F10 F11), we press F8 with great frequency.
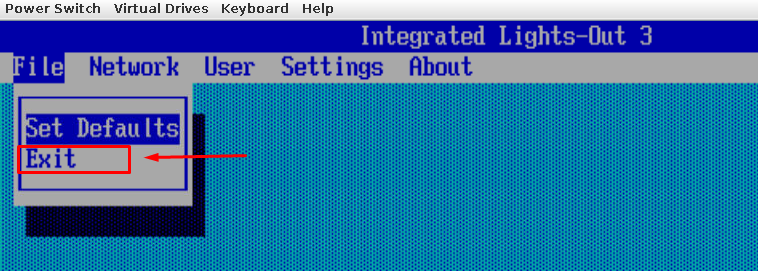
And after the appearance of this window, press Exit and now, with great frequency, press F8.
 After the window appears, with the possibility of partitioning the disk, we proceed to it.
IMPORTANT!!!
With these actions, all your data will be permanently deleted!
To partition disks in RAID 1, let's delete the previous partition. Choose Delete Logical Drive
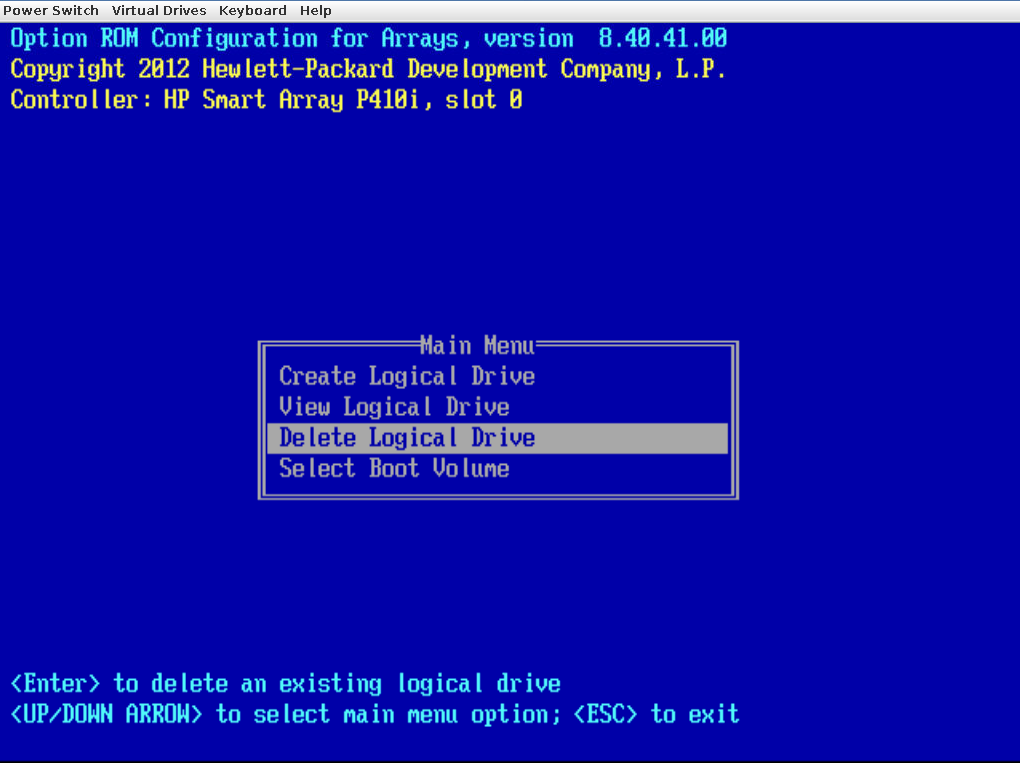
Next, to remove the logical drive, press F8.
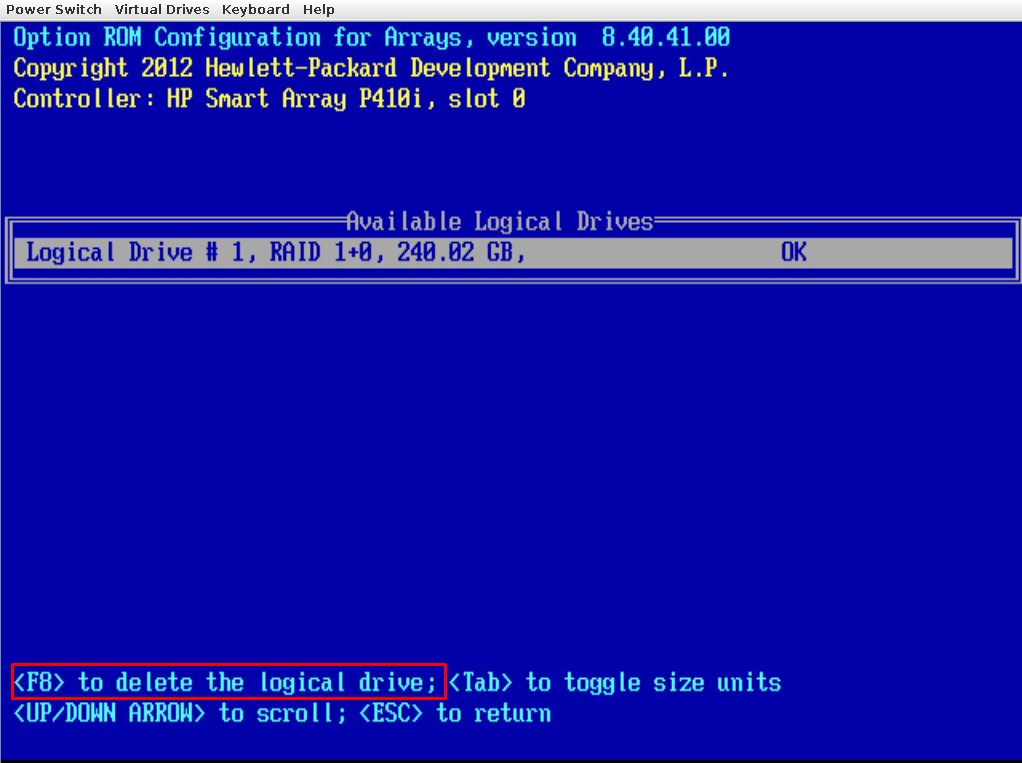 And to confirm the removal of the disk, press F3.
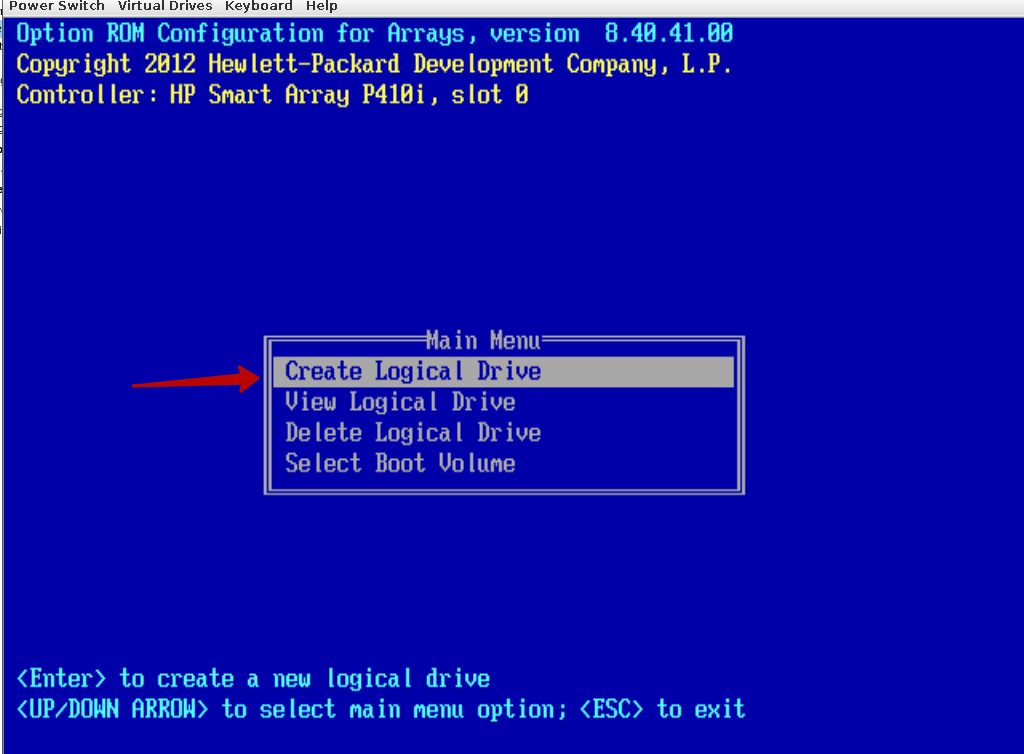
Now let's create a disk. Select Create Logical Drive
 In the window that appears, select the desired physical disk, depending on which RAID we need. For example, for RAID 1, select the items with the TAB and SPACE keys, as shown in the following illustration.
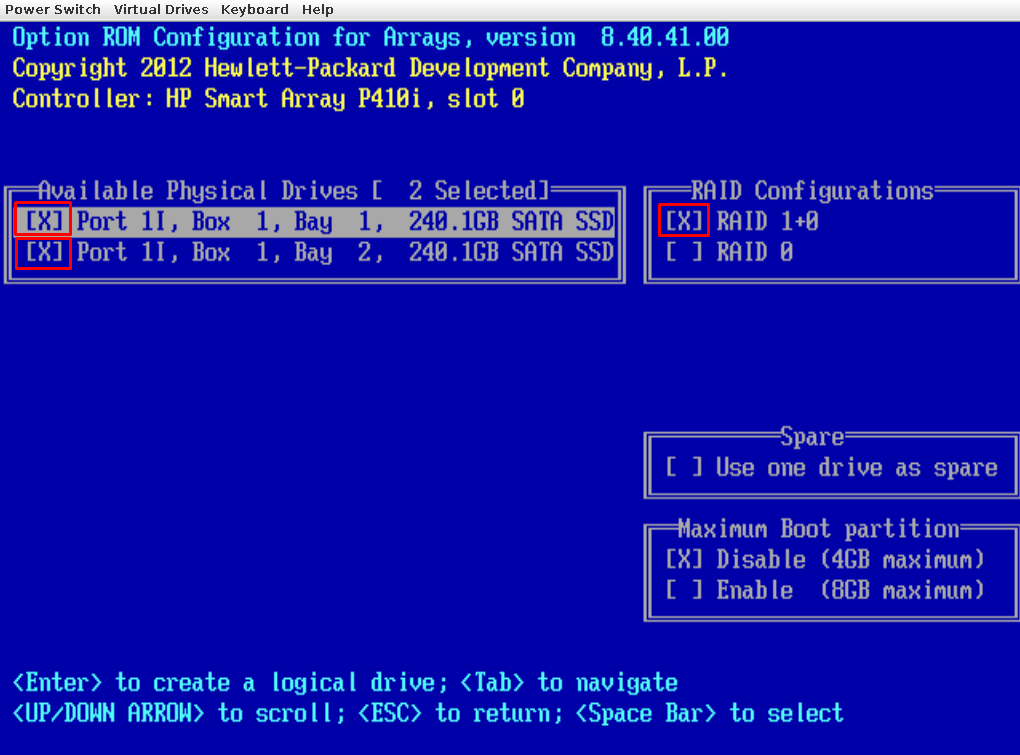
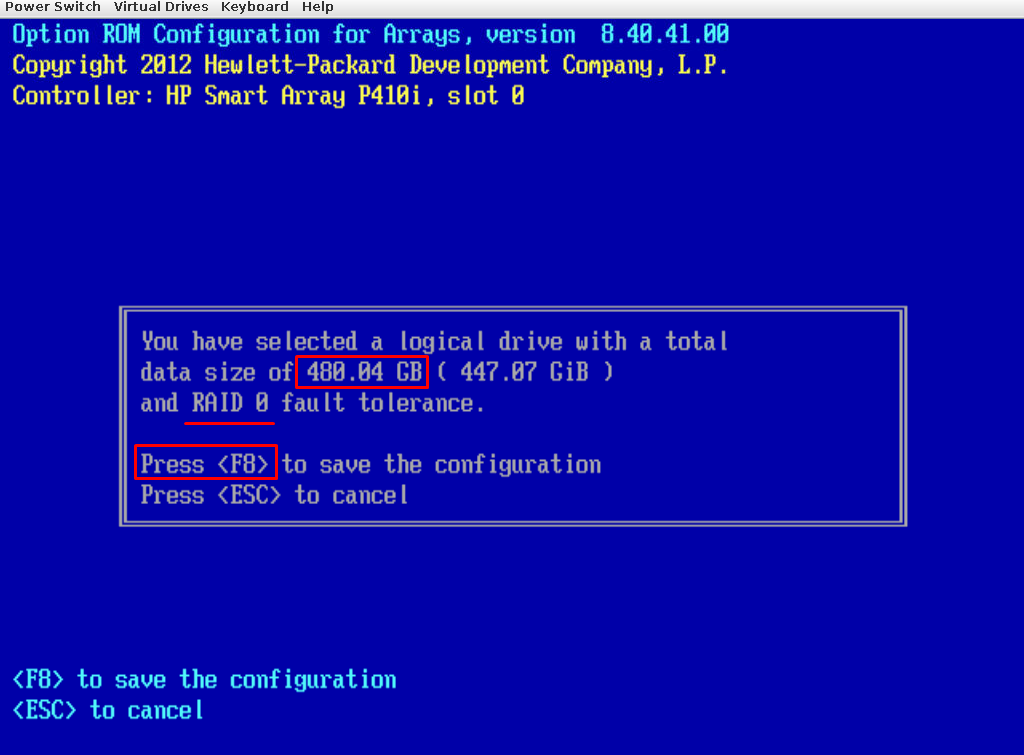
For RAID 0, set in the RAID Configuration window to RAID 0
 Press Enter. As in the first case with RAID 1, so in the second RAID 0, we confirm and save the new RAID configuration.
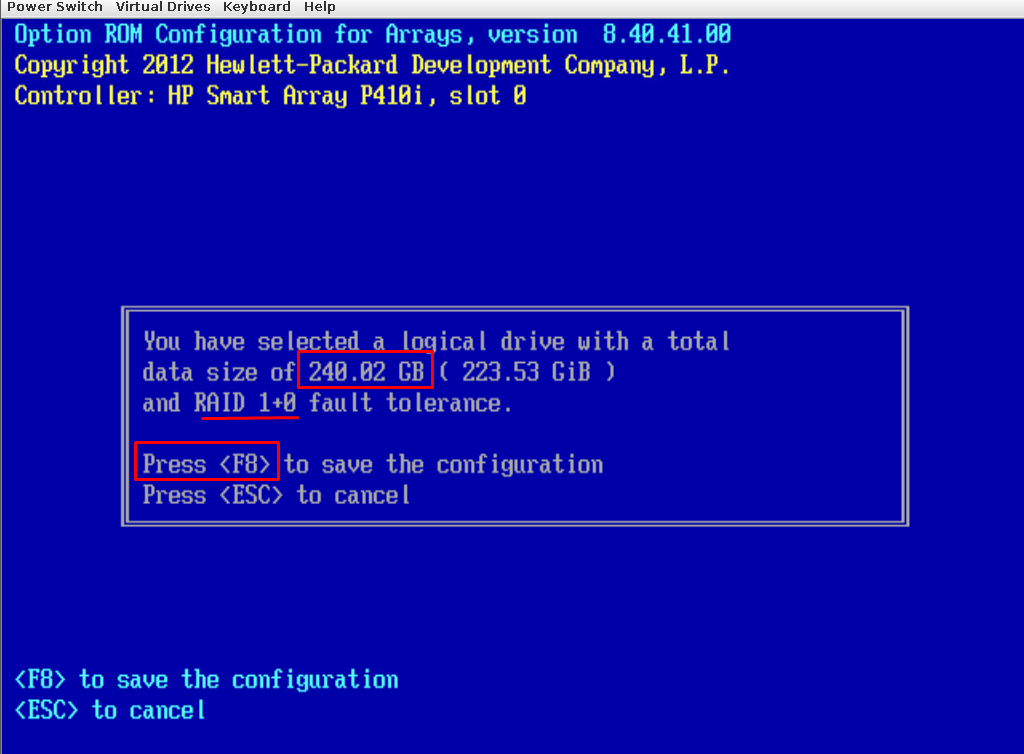
After returning to the Main Menu, you need to install the boot sector. To do this, select Select Boot Volume
 In the Boot Volume Enclosure Menu, set Direct Attached Storage and select any of the logical drives. If there is only one, choose him.
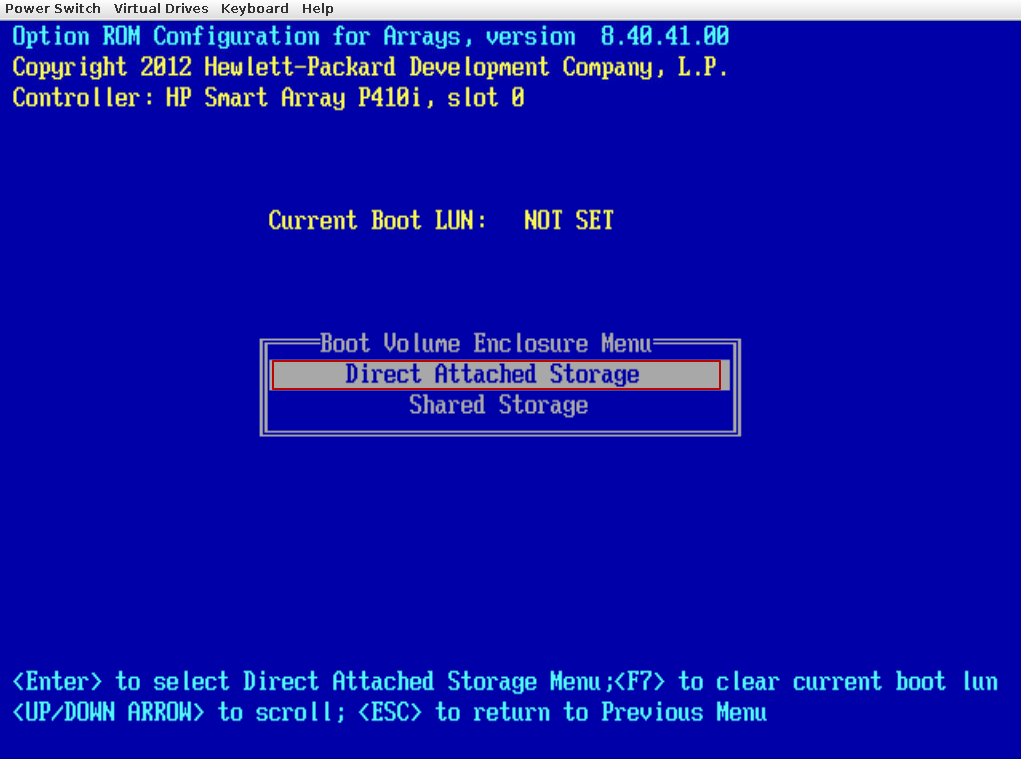
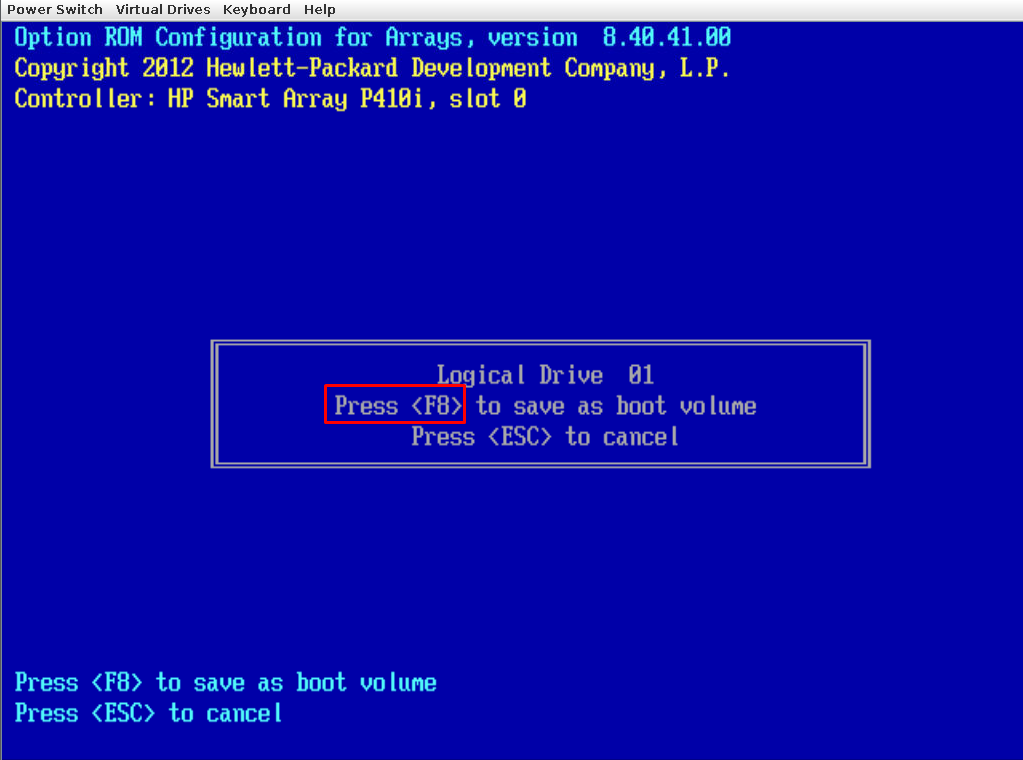
Press F8 to save the configuration and restart the server.
Congratulations. Now you can create RAID 0