
Ads and trackers can follow you. In most cases, advertising may not be appropriate. Thanks to trackers, your personal information will be used to determine the effective way to sell any product to you. Both banner ads and trackers slow down your browser and interfere with and degrade your browsing experience.
AdGuard Home is a software that keeps your network secure and blocks ads and trackers. In this article, we will look at how to install it in a Docker container using docker-compose as well.
Update OS packages.
apt update
Install the necessary packages and add a new repository:
apt install apt-transport-https ca-certificates curl gnupg-agent software-properties-common

curl -fsSL https://download.docker.com/linux/ubuntu/gpg | sudo apt key add -

add-apt-repository "deb [arch=amd64] https://download.docker.com/linux/ubuntu $(lsb_release -cs) stable"
Update the packages with the new repository:
apt update
Now let's install Docker.
apt-get install docker-ce docker-ce-cli containerd.io
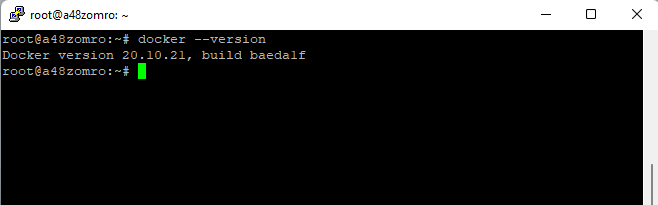
Let's check the version:
docker --version
Let's check the status:
systemctl status docker
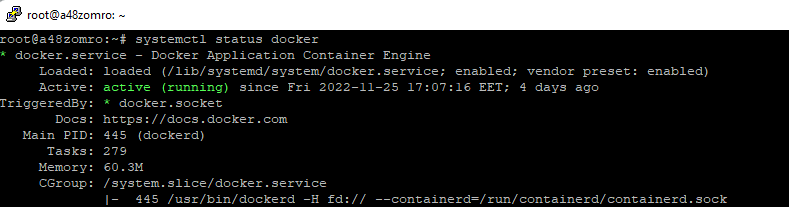
If it does not start, then run:
systemctl start docker
And add to autorun.
systemctl enable docker

For this project, version 1.25 will be enough for us.
curl -L "https://github.com/docker/compose/releases/download/1.25.5/docker-compose-$(uname -s)-$(uname -m)" -o /usr/local/bin /docker-compose
Set permissions to launch.
chmod +x /usr/local/bin/docker-compose
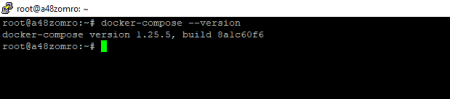
Check how Docker-Compose was installed:
docker-compose --version
Add a Linux user to the docker group:
usermod -aG docker $USER
Let's create a *.yaml file for Docker-Compose.
To navigate in the future in what we have installed, let's create a separate folder for this project in the /home directory and go to it.
mkdir /home/adguardhome && cd /home/adguardhome
You can also use a different directory to host this and other projects.
Let's use the repository to create the docker-compose.yaml file at https://hub.docker.com/r/adguard/adguardhome
Create a docker-compose.yaml or docker-compose.yml file,
vim docker-compose.yaml
And add the following code to it:
version: '3.3'
services:
    adguardhome:
        image: adguard/adguardhome
        container_name: adguardhome
        volumes:
            - /opt/adguardhome/work:/opt/adguardhome/work
            - /opt/adguardhome/conf:/opt/adguardhome/conf
        ports:
            - 53:53/tcp
            - 53:53/udp
            - 67:67/udp
            - 68:68/udp
            - 80:80/tcp
            - 443:443/tcp
            - 443:443/udp
            - 3000:3000/tcp
            - 853:853/tcp
            - 784:784/udp
            - 853:853/udp
            - 8853:8853/udp
            - 5443:5443/tcp
            - 5443:5443/udp
        restart: always
Where:
container_name: name of your container;
In the volumes block, specify the paths along which the configuration files will be available;
The ports block specifies the ports that need to be passed into the container.
Run the script (for this you need to be in the directory where our file was created. In this case, it is /home/adguardhome/):
docker-compose up -d
We are waiting for the download of images, and deployment.
We check:
docker-compose ps
Or:
docker ps

You can also install adguardhome with one command without using docker compose.
docker run --name adguardhome\\
     --restart unless-stopped\\
     -v /my/own/workdir:/opt/adguardhome/work\\
     -v /my/own/confdir:/opt/adguardhome/conf\\
     -p 53:53/tcp -p 53:53/udp\\
     -p 67:67/udp -p 68:68/udp\\
     -p 80:80/tcp -p 443:443/tcp -p 443:443/udp -p 3000:3000/tcp\\
     -p 853:853/tcp\\
     -p 784:784/udp -p 853:853/udp -p 8853:8853/udp\\
     -p 5443:5443/tcp -p 5443:5443/udp\\
     -d adguard/adguardhome
Now, in order to enter the administration panel, you need to disable the DNSStubListener on the server. To do this, create a directory and a new file:
mkdir -p /etc/systemd/resolved.conf.d
vim /etc/systemd/resolved.conf.d/adguardhome.conf
And add the following code to it:
[Resolve]
DNS=127.0.0.1
DNSStubListener=no
To enable resolve.conf, run the following commands:
mv /etc/resolv.conf /etc/resolv.conf.backup
ln -s /run/systemd/resolve/resolv.conf /etc/resolv.conf
Update DNSStubListener:
systemctl reload-or-restart systemd-resolved
Now we can use our IP to connect to adguardhome and install. After that, you can connect with the data that you entered during installation.
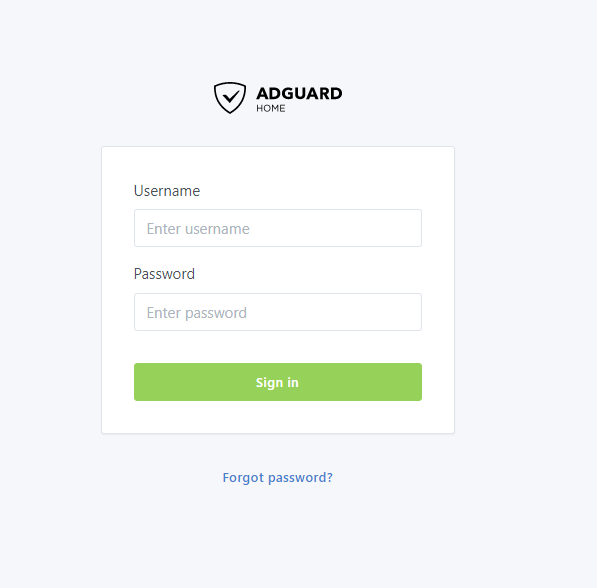
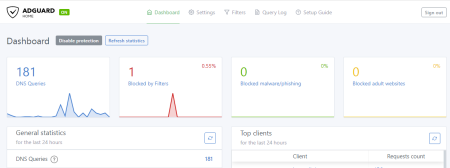
Approximately such a picture will be observed in your personal account.
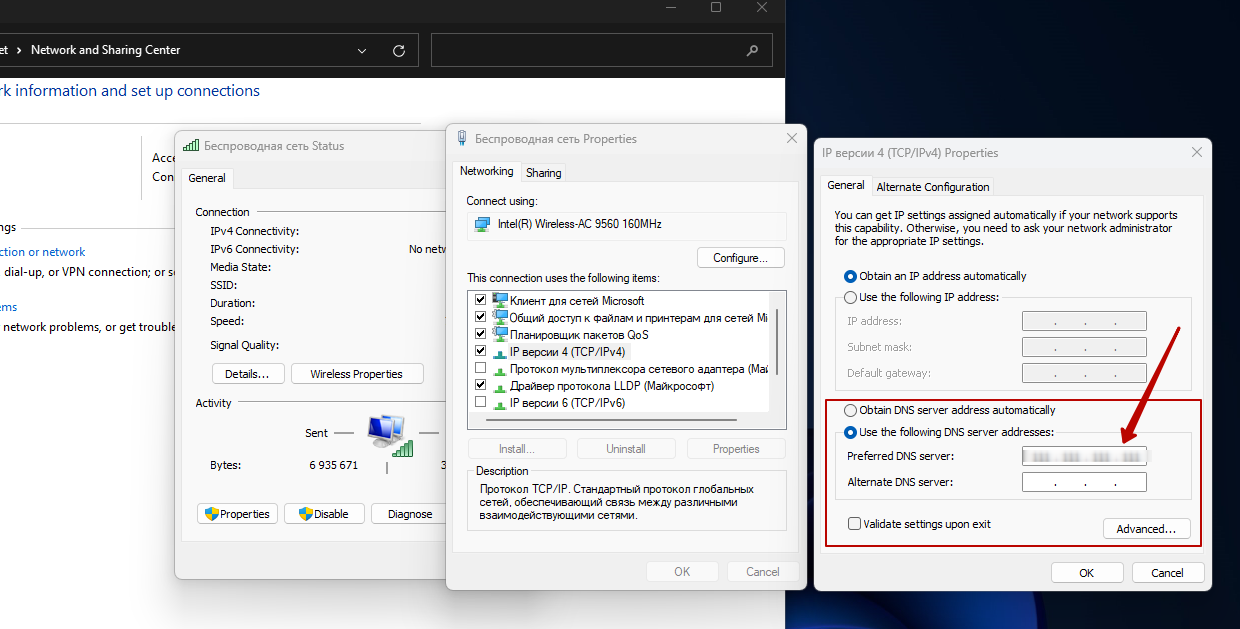
In order for adguardhome to start blocking ads, enter the IP of the server hosting adguardhome in the DNS field. This can be done both in the router and in a personal PC.
Enjoy surfing without trackers and ads.