Installing the Nextcloud cloud storage script will consist of the following items:
1. Create a subdomain, issue an SSL certificate and create a database for the repository.
2. Download the script installation files to the root folder of the subdomain
3. Install and configure the script
Let's get started.
1. The result of completing this step is that the cloud.yourdomain.com subdomain should be directed to the server (when clicking on the link, an empty page or a default page should open in the browser), and a database should be created.
The way to create a subdomain will depend on the type of control panel installed on the server. For example, let's use the free HestiaCP panel, which is already installed on a clean server (how to install HestiaCP)
In the Hestia panel, a subdomain is created in the same way as a regular domain. Let's go to the WEB menu - Add Web Domain

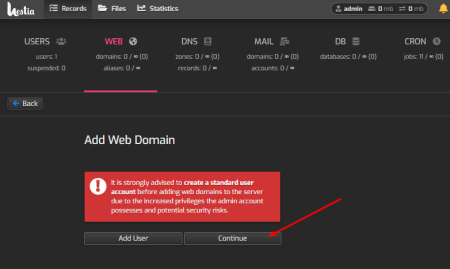
The panel will recommend that you create a separate user, since the admin user has privileged rights. You can use the recommendation and create a new user in the Hestia panel.
For our task, you can skip this step:
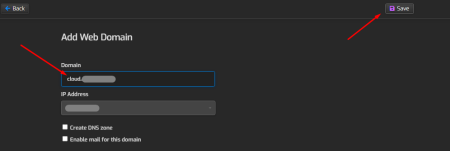
Specify the name of the subdomain where the storage will be available and save (the IP address will be added automatically)
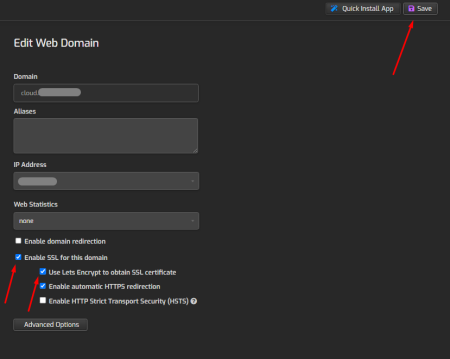
Let's issue a free SSL certificate from Lent's Encrypt for the subdomain. To do this, in the same WEB menu, click on the domain name. Next, check the boxes Enable SSL for this domain and Use Lets Encrypt to obtain SSL certificate and save.
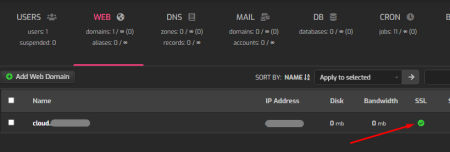
A sign of a successfully generated certificate will be the following label opposite our domain:
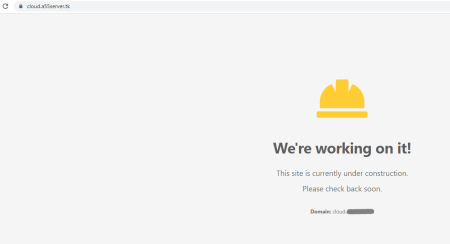
Now you can go to http://cloud.yourdomain.com/ in your browser and see an empty page of the site with an SSL certificate.
Now let's create a database for the repository. To do this, go to the menu DB - Add database

Enter the database name, user and password.
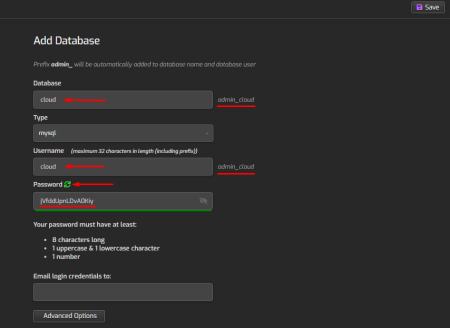
Save the values underlined in the screenshot, they will be needed during the installation of the script.
This completes the work in the panel.
2. Install the script on the server.
There are several options for installing NextCloud on a server. Let's use the simplest and fastest - installation using the installation file.
Download the installation file to your computer, then copy it to the server in the site folder cloud.yourdomain.com
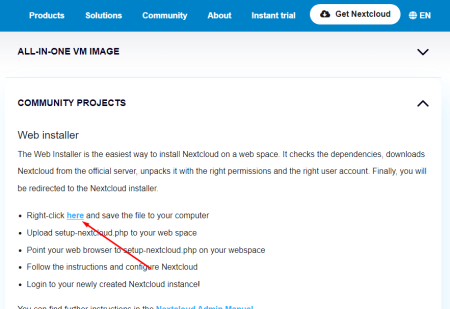
To download the installation file, go to https://nextcloud.com/install/, open the Community Projects section
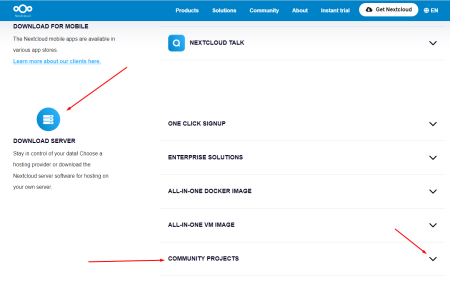
Click on the link and the setup-nextcloud.php file will be downloaded to your computer.
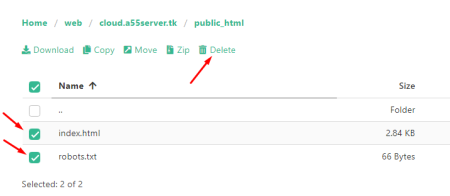
To copy the setup-nextcloud.php file to the site folder on the server, in the HestiaCP panel, go to the file manager

further - web - cloud.yourdomain.com (your domain folder) - public_html. Tick the index.html and robots.txt files and delete them.
Нажимаем Add files, выбираем скачанный ранее файл setup-nextcloud.php и закачивем его в папку сайта.
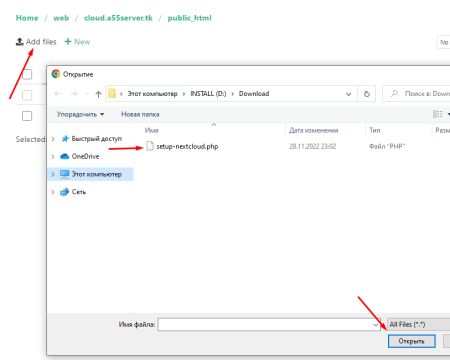
Note. You can also copy the installation file to the server using an FTP client.
3. To start the installation, go to the browser link https://cloud.yourdomain.com/setup-nextcloud.php
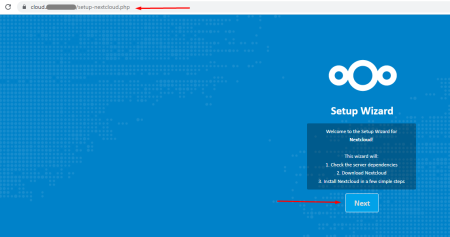
At the next step, we indicate that the script should be installed in the current folder by writing a single dot in the window:
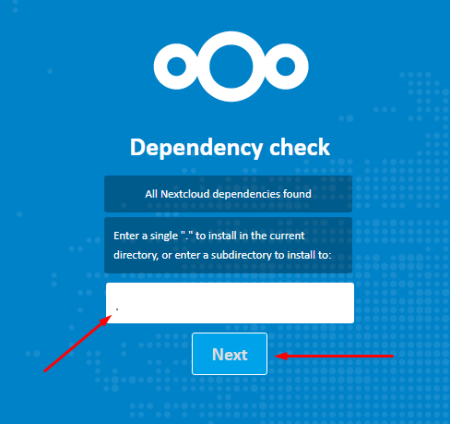
Wait until the download of the necessary files is completed, after which you will see the following window:
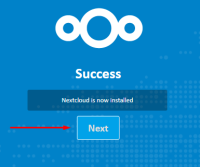
Feel free to click Next and your storage settings window will open.
Here you need to specify:
- Storage administrator username and password.
- Access data to a previously created database.
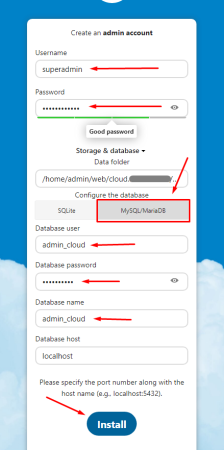
Wait for the installation to complete.
Your own cloud storage is now available at: https://cloud.yourdomain.com/
