The Hestia panel has already implemented the FTP functionality and has the FTP service installed on the server, all you need to do is to create an FTP user.
You can upload and download files to the server via FTP, you can also restrict access to the website folder, for example, this can be useful if several people work on the same project and they should have FTP access to the website folder for uploading files, but access to all other folders on the server must be restricted to these users.
In this article, I will show you how it can be done in the Hestia panel with just a few steps.
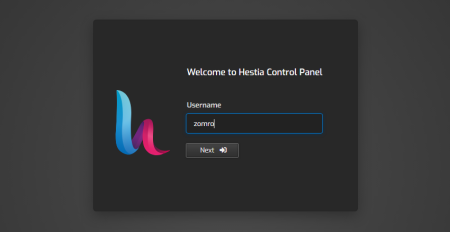
1. Enter the Hestia panel via the link below in which you need to replace the word "IPaddress" with the IP address of your server:
https://IPaddress:8083
Enter the user and password under which your website has been added to panel, in my case it is the user zomro, you will have any other user that you created before.
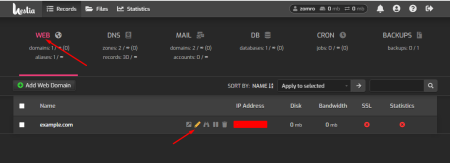
2. In the panel, go to the WEB tab, find the website you are interested in and click the Edit button next to the website:
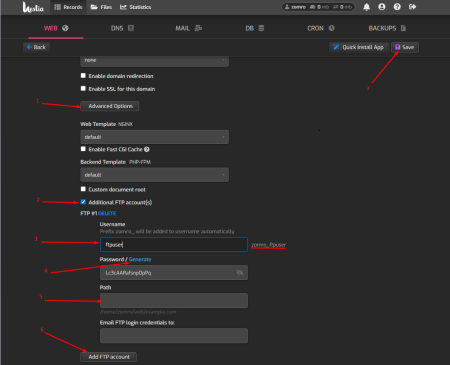
3. Click the Advanced Options button to see more options
Checkmark the box Additional FTP account(s)
Enter the FTP username, note that it will be prefixed with the Hestia's username,
for example, I work under the user zomro, respectively, the FTP user "ftpuser" will eventually will look like "zomro_ftpuser"
Enter or generate a password in the Password field
Be sure to write down the username and password, as you will be using this credentials later.
The Path option can be left empty, by default the Hestia panel assigns the path to the website folder automatically (/home/{user}/web/{website})
Click the Add FTP account button
Then click the Save button to save your settings.
4. FTP user is created and we can check connection using any FTP-client app, I will use Filezilla for this example.
Enter the server ip address, username and password we just created and specify port 21, then click the Quickconnect button:
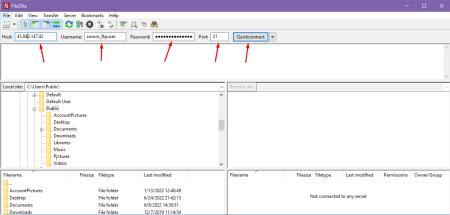
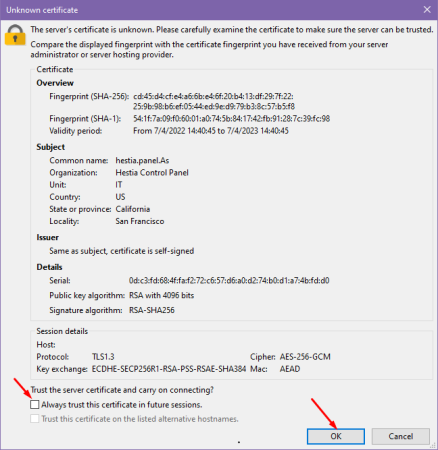
In the next window accept the certificate:
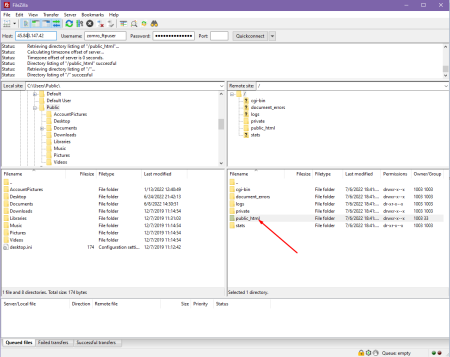
After that, we will connect to the folder of our website, we will not be access anything outside this folder, we have access only to it.
The folder contains the logs and other various additional folders that can be useful during development and the public_html folder, which is the most important for us.
The public_html folder that you see on the screenshot, is the folder where you should upload your website files.
That's all, we created an FTP user for the website folder and successfully connected to it via FTP connection
I hope this article was useful, thank you for your time!

